jsPsychを用いたWEB実験の実施:Google Spreadsheetにデータを保存しよう!
jsPsychはFirebaseやPavloviaを使って実施することができますが,Google Spreadsheet上で実施することもできます。それぞれ一長一短はありますが,Google Spreadsheetは日常的に使っている方もおられるでしょうし,サーバー費用などはかからないので,かなりお手軽に実施できます(ただ,Googleのサービスによって1日に作成可能なスプレッドシートの数には制限があるので,大規模なデータ収集には向かないと思います)。
詳しくは,jsPsychSheet: Running online behavioral experiments using jsPsych and Google Sheetを読んでいただけたらとは思いますが,以下では簡単に解説をします。
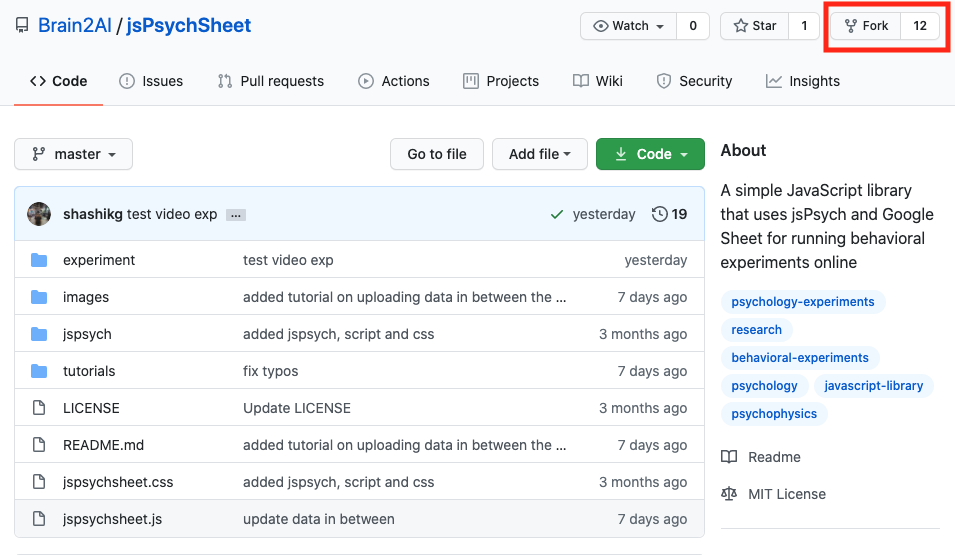
1.jsPsychSheetをForkして,GitHub pageを設定する
jsPsychSheetのGitHubリポジトリに移動して,Forkします(赤で囲った部分をクリックします)。
自分のGitHubアカウントにjsPsychSheetリポジトリがForkされたら,Settingsタブをクリックします。

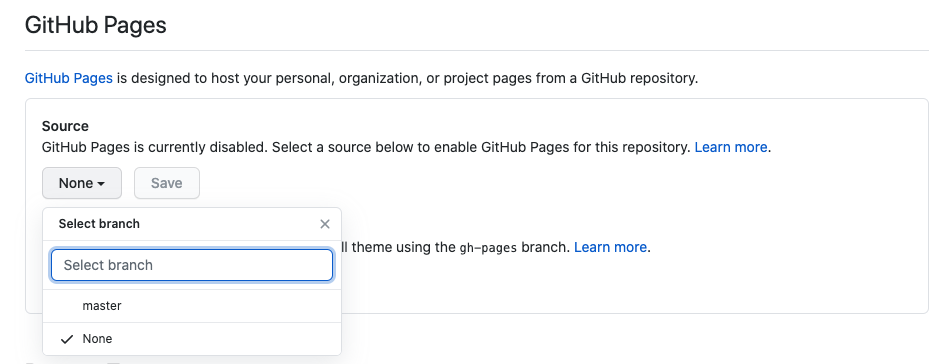
Settingsタブで下にスクロールして,GitHub Pagesってところにいきます。そこで,masterブランチを選んでください。「save」って出てくるので,それを押します。これで,ForkしたリポジトリのGitHub Pagesが有効になりました。
2.jsPsych課題の準備
以下の赤線で囲っている部分を押して,「Clone with HTTPS」のURLをコピーする。

RStudioでFile→New Project..→Version Contriol→Gitで,コピーしたURLを貼り付ける。
Simple Reaction Time Taskの準備
jsPsychのチュートリアルにあるSimple Reaction Time Taskを作ります。jsPsychSheetのリポジトリ内のexperimentフォルダ内に課題をおきます(2021/9/8 追記。現在,experimentフォルダがなくなっているようです,ご自身で追加をお願いします)。すでに,experimentフォルダ内には,Simple Reaction Time Taskが配置されていますが,以下では,Rmarkdownで再度作りましょう。
RStudioでexperimentフォルダをカレントワーキングディレクトリにする
以下をコンソールで実行
library(jsPsychRmd)
set_jsPsych()index.Rmdを開いて,{js}チャンク内にjsPsychチュートリアルのThe final codeの scriptから /scriptの内容をコピーして貼り付けします。
{js}チャンクの上の{r}チャンク内を以下のようにします。
library(htmltools)
tagList(
tags$script(src='jspsych-6.1.0/jspsych.js'),
tags$script(src='jspsych-6.1.0/plugins/jspsych-html-keyboard-response.js'),
tags$script(src='jspsych-6.1.0/plugins/jspsych-image-keyboard-response.js'),
tags$script(src='jspsych-6.1.0/plugins/jspsych-fullscreen.js')
)
ちゃんと動作するかKnitをして確かめてください。課題が動いたら,Gitでコミット&プッシュをしてください。
jsPsych課題でjsPsychSheetを使うための調整
- ForkしたjsPsychSheetリポジトリは,GitHub Pagesになっているので,以下のURLのいち部をユーザーアカウント名にするとアクセスできます。
https://
- 上記の課題をGoogle spreadsheet上で走らせる場合に,上記のURLからファイルにアクセスをします。そこで,画像を含む刺激系のファイル,jsPsychのjsライブラリなどは,上記のURLに変更をします。具体的には以下のようにします。
修正1前({r}チャンク内のjsライブラリ)
library(htmltools)
tagList(
tags$script(src='jspsych-6.1.0/jspsych.js'),
tags$script(src='jspsych-6.1.0/plugins/jspsych-html-keyboard-response.js'),
tags$script(src='jspsych-6.1.0/plugins/jspsych-image-keyboard-response.js'),
tags$script(src='jspsych-6.1.0/plugins/jspsych-fullscreen.js')
)
修正1後({r}チャンク内のjsライブラリ)
- GitHubのユーザーアカウント名はご自身のアカウント名に変更ください。
- jspsychsheet.jsとjspsychsheet.cssも追加します。
library(htmltools)
tagList(
tags$script(src='https://GitHubのユーザーアカウント名.github.io/jsPsychSheet/experiment/jspsych-6.1.0/jspsych.js'),
tags$script(src='https://GitHubのユーザーアカウント名.github.io/jsPsychSheet/experiment/jspsych-6.1.0/plugins/jspsych-html-keyboard-response.js'),
tags$script(src='https://GitHubのユーザーアカウント名.github.io/jsPsychSheet/experiment/jspsych-6.1.0/plugins/jspsych-image-keyboard-response.js'),
tags$script(src='https://GitHubのユーザーアカウント名.github.io/jsPsychSheet/experiment/jspsych-6.1.0/plugins/jspsych-fullscreen.js'),
tags$script(src="https://GitHubのユーザーアカウント名.github.io/jsPsychSheet/jspsychsheet.js"),
tags$link(rel="stylesheet",href="https://<GitHubのユーザーアカウント名>.github.io.github.io/jsPsychSheet/jspsychsheet.css")
)
修正2前({js}チャンク内のimgの場所)
    var instructions = {
      type: "html-keyboard-response",
      stimulus: "<p>In this experiment, a circle will appear in the center " +
          "of the screen.</p><p>If the circle is <strong>blue</strong>, " +
          "press the letter F on the keyboard as fast as you can.</p>" +
          "<p>If the circle is <strong>orange</strong>, press the letter J " +
          "as fast as you can.</p>" +
          "<div style='width: 700px;'>"+
          "<div style='float: left;'><img src='img/blue.png'></img>" +
          "<p class='small'><strong>Press the F key</strong></p></div>" +
          "<div class='float: right;'><img src='img/orange.png'></img>" +
          "<p class='small'><strong>Press the J key</strong></p></div>" +
          "</div>"+
          "<p>Press any key to begin.</p>",
      post_trial_gap: 2000
    };
修正2後({js}チャンク内のimgの場所)
    var instructions = {
      type: "html-keyboard-response",
      stimulus: "<p>In this experiment, a circle will appear in the center " +
          "of the screen.</p><p>If the circle is <strong>blue</strong>, " +
          "press the letter F on the keyboard as fast as you can.</p>" +
          "<p>If the circle is <strong>orange</strong>, press the letter J " +
          "as fast as you can.</p>" +
          "<div style='width: 700px;'>"+
          "<div style='float: left;'><img src='https://GitHubのユーザーアカウント名.github.io/jsPsychSheet/experiment/img/blue.png'></img>" +
          "<p class='small'><strong>Press the F key</strong></p></div>" +
          "<div class='float: right;'><img src='https://GitHubのユーザーアカウント名.github.io/jsPsychSheet/experiment/img/orange.png'></img>" +
          "<p class='small'><strong>Press the J key</strong></p></div>" +
          "</div>"+
          "<p>Press any key to begin.</p>",
      post_trial_gap: 2000
    };
修正3前({js}チャンク内のimgの場所)
    /* test trials */
    var test_stimuli = [
      { stimulus: "img/blue.png", data: { test_part: 'test', correct_response: 'f' } },
      { stimulus: "img/orange.png", data: { test_part: 'test', correct_response: 'j' } }
    ];
修正3後({js}チャンク内のimgの場所)
        /* test trials */
    var test_stimuli = [
      { stimulus: "https://GitHubのユーザーアカウント名.github.io/jsPsychSheet/experiment/img/blue.png", data: { test_part: 'test', correct_response: 'f' } },
      { stimulus: "https://GitHubのユーザーアカウント名.github.io/jsPsychSheet/experiment/img/orange.png", data: { test_part: 'test', correct_response: 'j' } }
    ];
修正4前(結果の保存方法)
    /* start the experiment */
    jsPsych.init({
      timeline: timeline,
      on_finish: function() {
        jsPsych.data.displayData();
      }
    });
修正4後(結果の保存方法)
- csv形式で保存するようにします
jsPsych.init({
  timeline: timeline,
  on_finish: function() {
      jsPsychSheet.uploadData(jsPsych.data.get().csv());
  }
});
修正ができたら,knitして,Gitでコミット&プッシュをしてください。
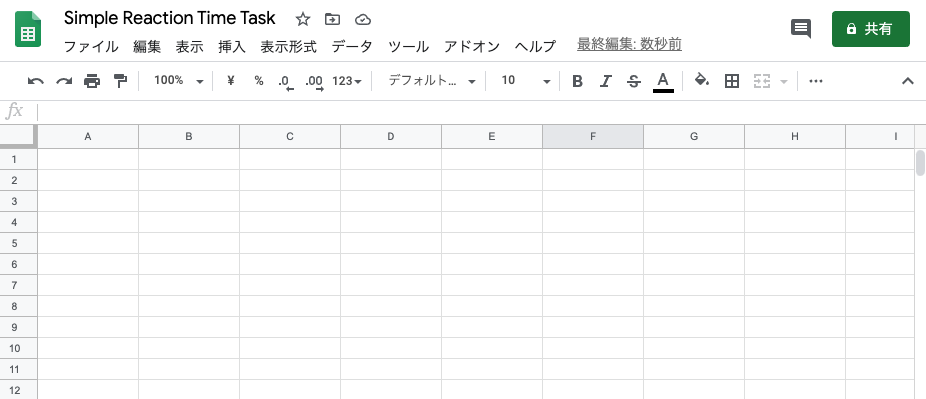
3.Google Spreadsheetの設定
Google Driveで新規にスプレッドシートを作ります(名前を適当につけてください)。
「ツール」から「スクリプトエディタ」を押してください。
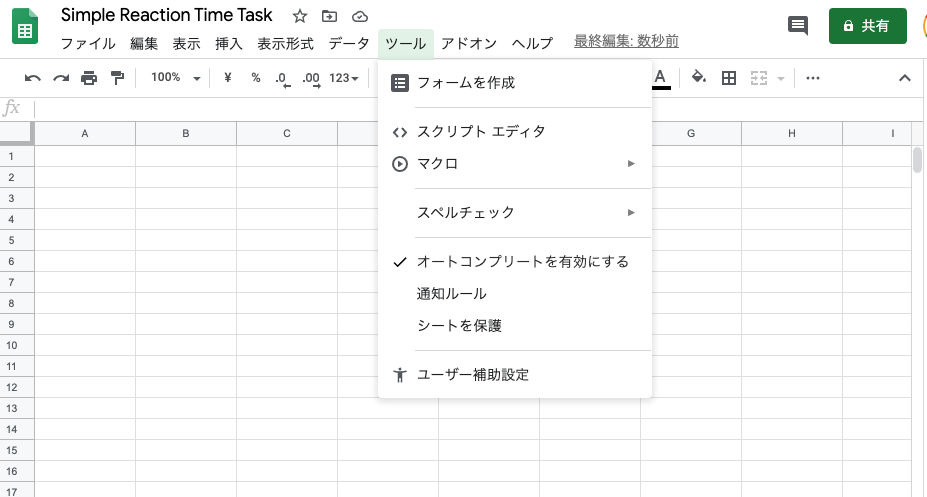
以下のような画面がでてきます。
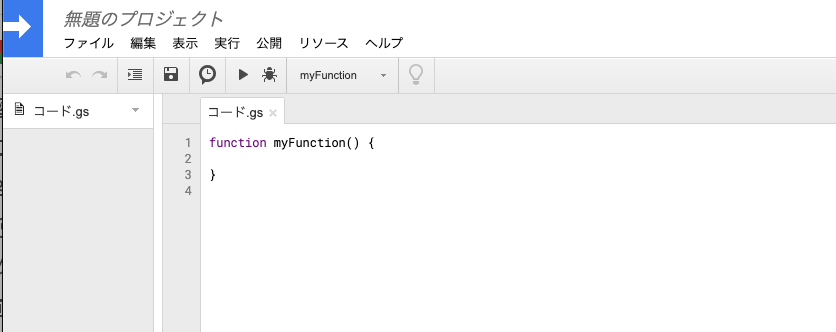
以下のコードをコード.gsに上書きしてください。
// App Script function to host the html page
function doGet() {
  return HtmlService.createHtmlOutputFromFile('index');
}

// App Script function to interact with google sheet
function addData(data) {
  var ss = SpreadsheetApp.getActiveSpreadsheet();
  var sheet = ss.insertSheet(0);
  var i;
  for(i=0; i< data.length; i++){
    sheet.appendRow(data[i]);
  }
}

// App Script function to interact with google sheet
function addDataMultiBlock(data, start=0) {
  var ss = SpreadsheetApp.getActiveSpreadsheet();

  if (start == 1){
    var sheet = ss.insertSheet(0);
  } else {
    var sheet = ss.getActiveSheet();
  }

  var i;
  for(i=0; i< data.length; i++){
    sheet.appendRow(data[i]);
  }
}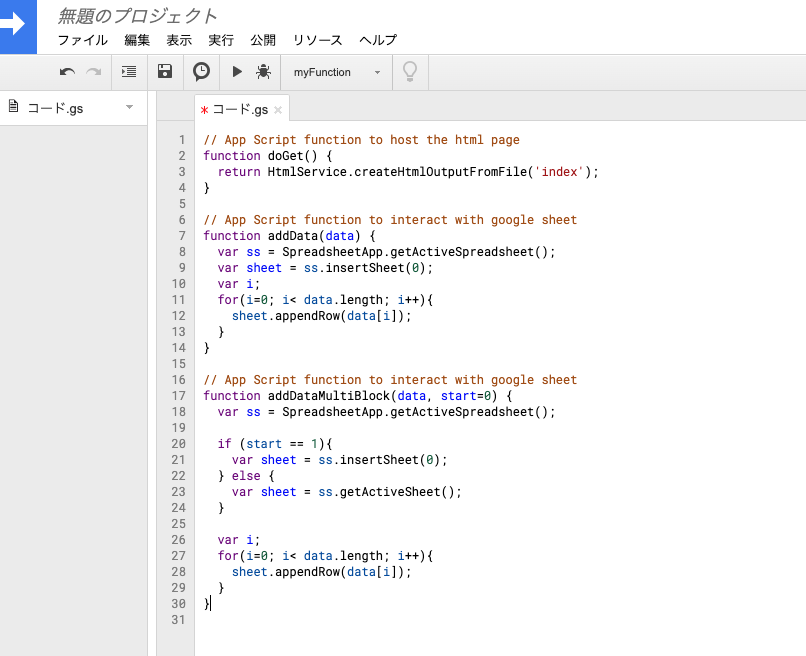
保存します。
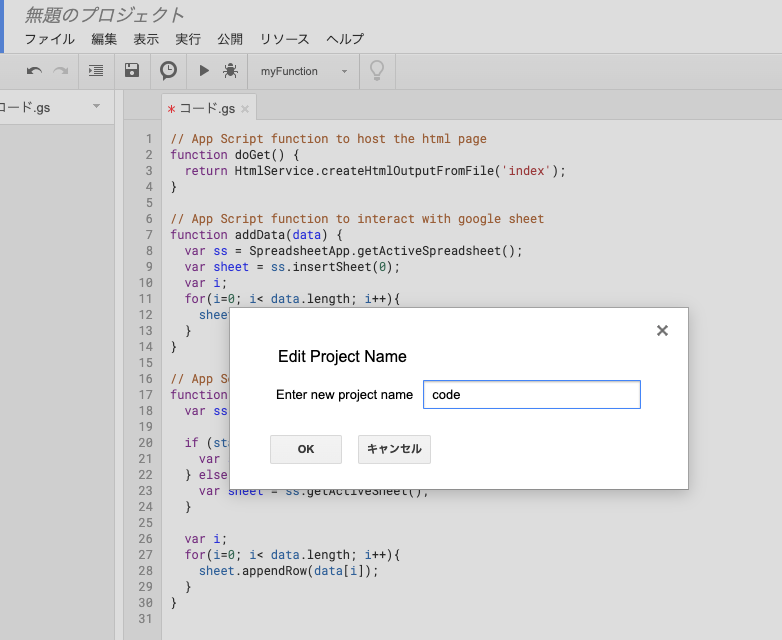
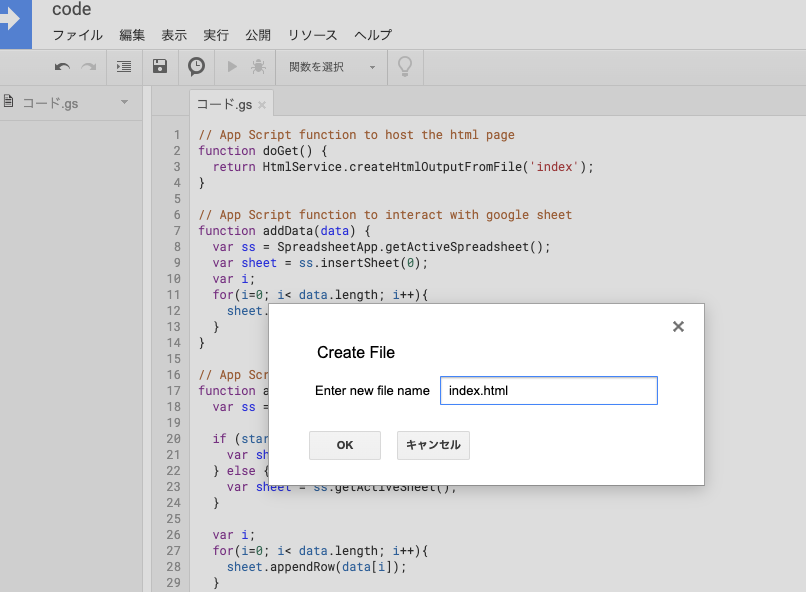
「ファイル」から「HTMLファイル」を押します。
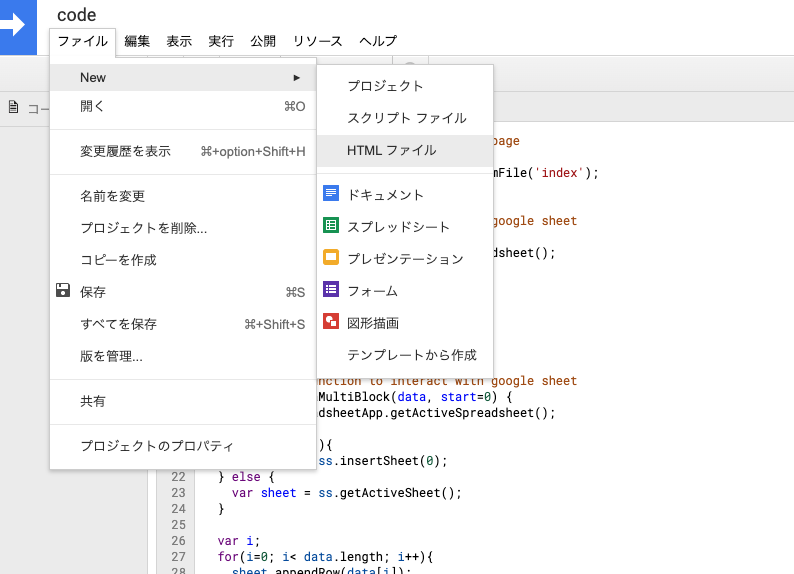
必ず,index.htmlという名前にしてから,「OK」を押してください。
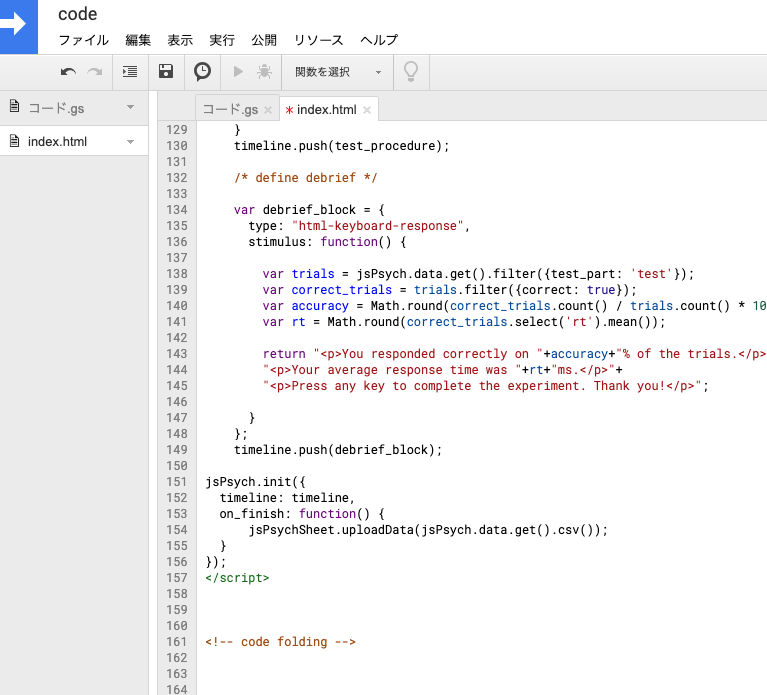
index.htmlが開くので,ここに,先程RStudio上で作成した実験課題のHTMLを貼り付けます(具体的には,HTMLファイルをクリックして,Open in Editorを選びます。その開いた内容をコピーして,貼り付けます)。
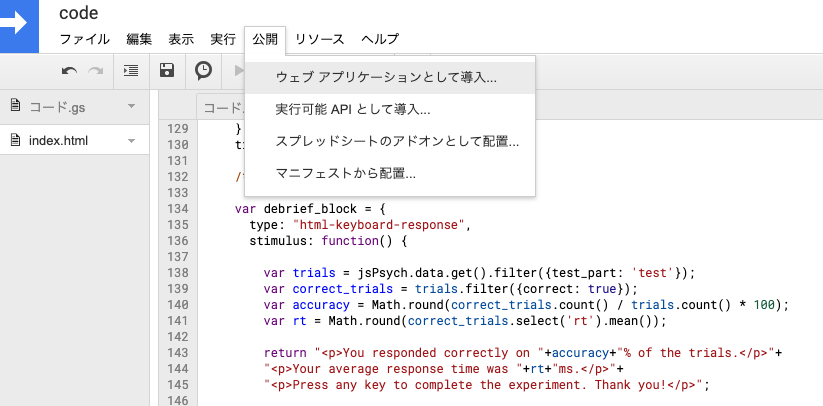
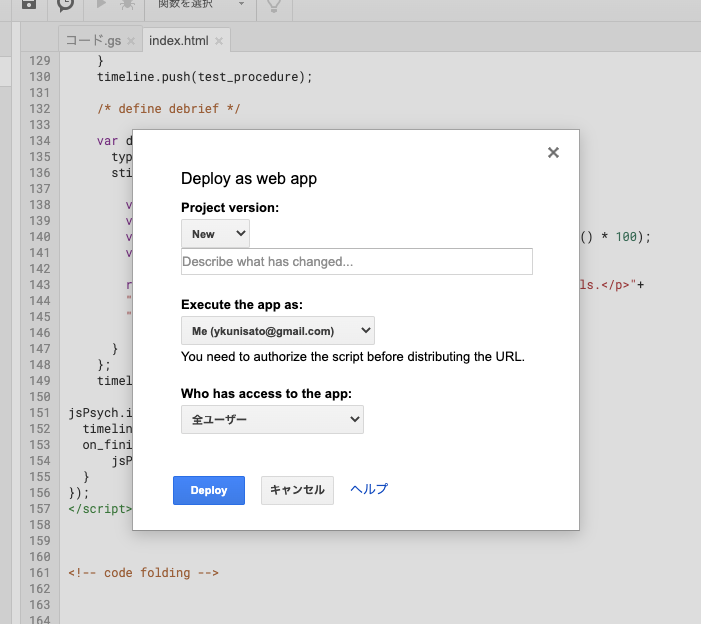
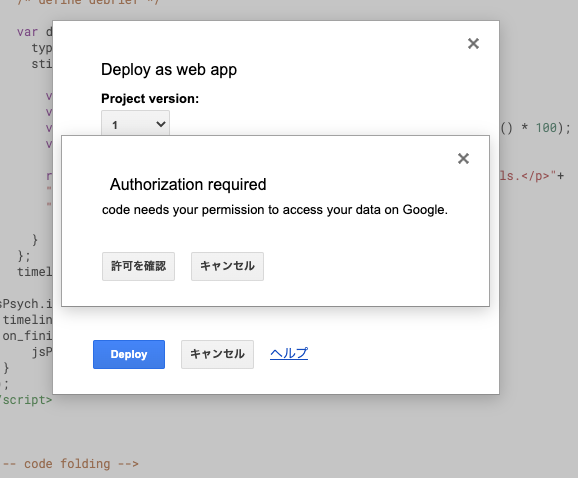
「公開」から「ウェブアプリケーションとして導入」を押します。
「who has access to the app:」では,「全ユーザー」を選んでください。Deployを押します。
「許可を確認」を押します。
なんか怖いメッセージがでてきます。
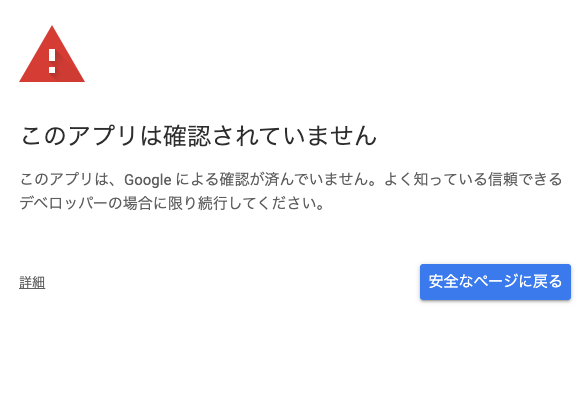
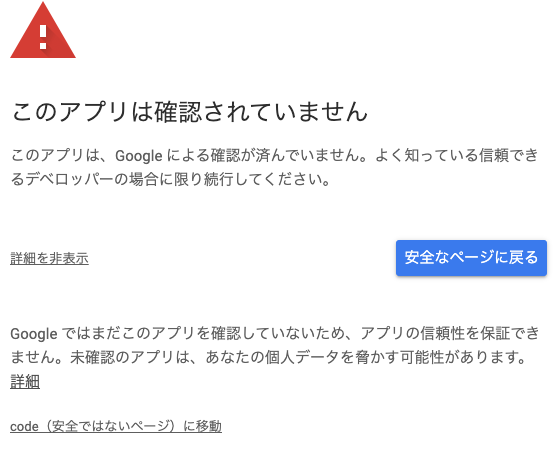
「詳細」を押して,「(安全ではないページ)へ移動」を押します。
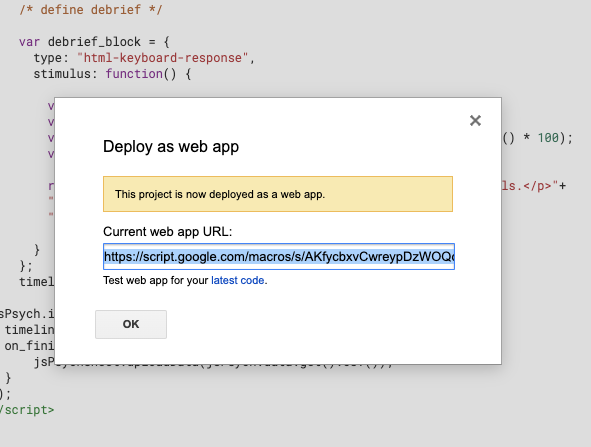
課題が行われるウェブページのURLが出てくるのでコピーします。コピーしたURLにいくと実験課題ができます。
課題が終わったら,以下のようにスプレッドシートにデータが保存されます。
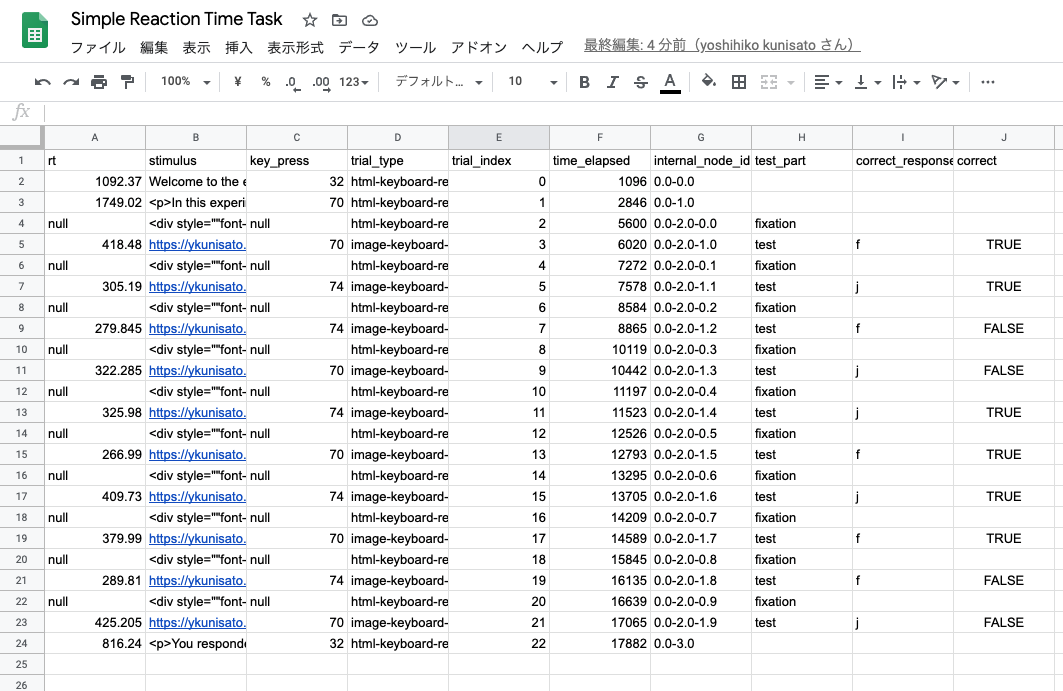
設定を丁寧にすれば,思ったよりも簡単にGoogle スプレッドシートを使って課題の実行とデータの保存ができました!